Spiga

How Do I Increase My Alexa Ranking?

After AdOnion’s Guaranteed SEO started there were many inquiries about our SEO program and one questions that have been asked quite a few times were would SEO help with my Alexa Ranking.


First we have to understand how Alexa’s ranking works, your Alexa Ranking this is taken straight out of Alexa’s website: “Alexa’s traffic rankings are based on the usage patterns of Alexa Toolbar users and data collected from other, diverse sources over a rolling 3 month period. A site’s ranking is based on a combined measure of reach and pageviews. Reach is determined by the number of unique Alexa users who visit a site on a given day. Pageviews are the total number of Alexa user URL requests for a site. However, multiple requests for the same URL on the same day by the same user are counted as a single pageview. The site with the highest combination of users and pageviews is ranked #1.” Source: Alexa.com


As you can see that Alexa Ranking is measured by the reach and pageviews therefore, in the long run once your SEO improved your Alexa Ranking will automatically improved. SEO helps you to improve your rankings on search engines as many of you already know and probably do it yourself, when you are doing research on the Internet most of the time your first destinations are search engines. A user generally reviews no more then 2 pages of search results therefore it is important to get listed on the first page of the search results in order to be viewed by users. Once your optimization is done you will ranked on the first page and generally will get a massive amount of traffic on a daily basis to your website, as Alexa’s ranking is measured by reach and pageviews your Alexa ranking will definitely improved.


In addition to SEO, another approach is to advertise online on a CPM basis using full page popunders. The reason is that when you advertise via full page popunders the users have already landed on your home page and if they find it interesting they will click on other links on your website to find out more. By starting a full page popunder campaign you are basically increasing your website’s reach and with interested users learning more about your website they are generally providing you with high pageviews.

Read More......

Scroll Bar for Blog Post Body

Adding Scrollbar to Blog Post body
once you are logged into Blogger account, go to Template -> Edit HTML and scroll to this code. Add the portion shown in red:-


Step 1 : Open your Blogger Account and Edit Html Under Layouts Tab;

Set 2 : Search for .post ( by browser Search) and Put the Red Portion in Curly Bracket. { }


  .post {
height:200px;
overflow:auto;

}


This will give you scrollbars to every post:-

Scrollbars within Blog Post
Sometimes, you may not want to have the scrollbars to all the [...]

This will give you scrollbars to every post:-


Scrollbars within Blog Post


scrollbarpost

This setting, scrollbars will automatically appear according to your need:-

Sometimes, you may not want to have the scrollbars to all the blog posts, but only for several paragraphs within a post. Assuming you are writing an article and you wish to enclose some long text within a scrollbox, you have to first define a class within the stylesheet.

For example, we can insert in the stylesheet this code to specify the maximum height and width of the scrollbox. Once the text overflows


Step 1 : Open your Blogger Account and Edit Html Under Layouts Tab;

Set 2 : Search for </b:link> by Browser search place the below code before it.

.scrollbox {

height:100px;

width:400px;

overflow:auto;

}

Step 3: Save the template.


Next, when you are writing a post, switch from the “Compose” mode to the “Edit HTML” mode and put the below code where your want to appear scrolling bar.


scrollbarpost1


<div class=”scrollbox”>TEXT TO BE INCLUDED IN THE SCROLLBOX.</div>


You can continue typing the post by switching back to the “Compose” mode.

After you are done, when you publish your post, you will see that only the part of the text comprised with the tags will be in a scrollbox, like this:-

Read More......

Adding Background Image to Post Titles

Code

Dcloud Of Dcblog brought this fantastic thing to us.By this we can put a Image Just behing the Post Title like on his blog.It’s Very Simple,the only thing is that you need to have a superb image to put on their.

You will have to just check hard for the codes to implement as different blogger have different type of coding.

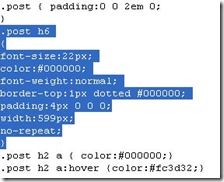
To locate the code which controls the post titles go to your Layout Tab (located in your Customize window) and click the Edit HTML sub tab. The code you are searching for is “.post h6″ (it can be something else also,So try searching) which looks like this


Now to get the background image in there you have to add the code “background: url()” like this:


.post h6
{
font-size:22px;
color:#000000;
font-weight:normal;
border-top:1px dotted #000000;
padding:4px 0 0 0;
width:599px;
no-repeat;
background: url(http://www.yourserver.com/yourimage.gif) no-repeat;
}


Now Check your blog the image might be partially visible only so add the height attribute(equivalent to the height of the image).

.post h6
{
font-size:22px;
color:#000000;
font-weight:normal;
border-top:1px dotted #000000;
padding:4px 0 0 0;
width:599px;
no-repeat;
background: url(http://www.yourserver.com/yourimage.gif) no-repeat;
}
height: 80px;


Now Checkout your blog,now you have to add/change the padding codes as you thinkl according to your blog to properly align the title within the image.

Read More......

Add an Image Beside Post Title

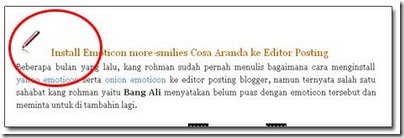
Don’t you want your blog look beauty? Maybe you can add several accessories. One of them is adding a small image beside post title, for example : please take a look the image below :
image-title_03
How to adding a small image at the post title? here is the steps.


Step #1
You must have a small image image, for example like this :
mypencil 

Step #2
Upload your small image to image hosting. For example : you can upload your image to blogger, Yahoo geocities, Google pages, or another free image hosting. If you has been uploading your image, please get the image code. for example : I'm has been upload an image to Blogger and the image code is :


https://blogger.googleusercontent.com/img/b/R29vZ2xl/AVvXsEiCvllqAsakfWdUI1-ktBLNllwDgwjfiQSpXoZRsfxSjdP5zVSKMRgGrOGa4UyBsKO6AYf987rAaKQyjb-sv86EOE40eBlzAlyf7z6LJEySwYvYp6wE2KB_eULyiLphiuuEH19FxJnjv4M/s400/mypencil.jpg


So that the picture can appear at your blog, you must create the code like this :


<img src="https://blogger.googleusercontent.com/img/b/R29vZ2xl/AVvXsEiCvllqAsakfWdUI1-ktBLNllwDgwjfiQSpXoZRsfxSjdP5zVSKMRgGrOGa4UyBsKO6AYf987rAaKQyjb-sv86EOE40eBlzAlyf7z6LJEySwYvYp6wE2KB_eULyiLphiuuEH19FxJnjv4M/s400/mypencil.jpg"/>

And the image will appear like this :
mypencil


Step #3
Add the image code to your template code. Here are the steps to add image code to your blog.


Or, do you still using old (classic) template? Never mind, bellow is the steps adding image code to classic template :


  1. Login to blogger with your ID.
  2. At the dashboard page, click Template.
  3. Click Edit HTML.
  4. Back up your template code (important!).
  5. Find this code :

  6. <BlogItemTitle$>
  7. Replace your image code beside above code :
  8. <img src="https://blogger.googleusercontent.com/img/b/R29vZ2xl/AVvXsEiCvllqAsakfWdUI1-ktBLNllwDgwjfiQSpXoZRsfxSjdP5zVSKMRgGrOGa4UyBsKO6AYf987rAaKQyjb-sv86EOE40eBlzAlyf7z6LJEySwYvYp6wE2KB_eULyiLphiuuEH19FxJnjv4M/s400/mypencil.jpg"/> &nbsp; <BlogItemTitle$>

  9.  

  10. Click Save Settings button.
  11. Done. Now your every post title will appear with your small image.


This is for new blogger template (beta template) :


  1. Login to Blogger with your ID.
  2. At the dashboard page, click Layout.
  3. Click Edit HTML.
  4. Back Up your template code (important!).
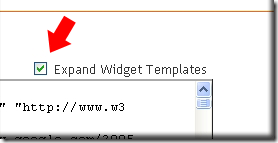
  5. Please mark the little box beside Expand Widget Template. Wait for a moment

  6. expand-widget
  7. Go to your template code, and find the code like this :

  8. <a expr:href='data:post.url'><data:post.title/></a>
  9. Add your image code like this :
  10. <a expr:href='data:post.url'> <img src="https://blogger.googleusercontent.com/img/b/R29vZ2xl/AVvXsEiCvllqAsakfWdUI1-ktBLNllwDgwjfiQSpXoZRsfxSjdP5zVSKMRgGrOGa4UyBsKO6AYf987rAaKQyjb-sv86EOE40eBlzAlyf7z6LJEySwYvYp6wE2KB_eULyiLphiuuEH19FxJnjv4M/s400/mypencil.jpg"/> &#160; <data:post.title/></a>

  11. Click SAVE TEMPLATE button.
  12. Done. Now your every post title will appear with your small image.

All right brothers, see you at my next tutorial.

Read More......

15 Best Image Search Engines to Find Photos

aishwary rai


What to find a great photo or perfect celebrity picture? This list of best image search engines will help you find interesting photos in the easiest way possible. You will learn about hidden preferences, unique features that will make you searches images like a professional and actually find the best images possible. Check them out… and see their test results on Aishwarya Rai.


Imagery

Imagery is my favorite image search engine due to the intuitive interface. This has a cool tabbed search interface to browse your searched images. Just keep searching new image terms, which keep compiling in new tabs, click to load full size image at the bottom or in new window. Loads 20-100 images at a time in ajax-y fashion. Best for research and keep collecting all your search images easily. You can tweak preferences to select JPG, GIF or PNG, sort by size, sort by black and white, grayscale or color and of course get safe for work images too. Test


Google Images Search

Google Image Search is probably the most common image search engine you might have used. Gives you thousands of image results very fast. But a limitation is you need to click to the image source page to see the full size image (Power it up with Google Image Ripper to get no more thumbnails and load full size images directly). You can sort images by JPG, GIF, BMP or PNG, sort by b&W or color, with an option for extra large images. You can also search news content and faces too! (Face test). Improve Google Image Search results using the Google Image Labeler. Use more filters to stop that NSFW image with moderate filtering or strict filtering. Test.


Yahoo! Image Search

Yahoo Image Search will find photos and clicking on images will take you to the source page with a framed interface, with an option to mail to a friend. You can opt for color and b&w by quick links. Select photo size with a wallpaper mode too which gives you images on all usual desktop sizes (Test wallpapers). It gives related searches too at the bottom of results. Its also powers the AlltheWeb search engine. Test.

Ask Images

Ask Images Search will search your desired images and suggest ways to expand or narrow your search for better results. A unique preference is finding buddy icons (Test). It will suggest related information from Wikipedia, videos from Youtube, news, profiles and more. Test.


MSN Live Image Search

MSN Live Image Search searches through all images of your choice. One cool option is to search “Showing only images of your desktop size” to find that ideal wallpaper even if you do not know your display settings. Another cool feature is you can drag images from the search results to a scratchpad and create a photo collection. Find related results. You can adjust a slider to see smaller thumbnails and fit in more photos. Test


AltaVista Image Search

AltaVista Image Search has similar search results, with an option to select graphics and buttons / banners too. You can also quickly sort by a huge range of prefixed desktop sizes and very useful to find wallpapers for your desktop (Test 1024×768 wallpapers). Clicking on “more info” below those images will take you a list of all webpages that host that same image. Test


Picsearch

PicSearch claims to index 2 billion images on the web. All images are output-ed as thumbnails and click through to a framed page with the original source. Selecting the preferences you can select only animations only. You can also sort images by various image sizes based by pixels (Test <50px). And they are family friendly images by default, which cannot be changed. Test. It also powers Ditto.


Exalead Image Search Engine

Exalead will let you change the background to black or white. Then you can customize it to find few prefixed size desktop wallpapers. It can also search faces. You can again choose color or B&W and image sizes. You can click on options to view direct image links with no frames. Or click the image to browse the images and their source sites in frames. Test.


Pixsy

Pixsy will let you search and extract images from popular free image hosting services Webshots, Photobucket, Sevenload, SuperiorPics, ViewImages etc. Switch the media type to Images in the drop down options. Clicking the image will take you to the framed page, where you can browse images, and see source page. You can email or save to ‘My Pixsy’ too. Test.


Visoo

Visoo uses the power of its Visual Content Analysis to provide highly accurate information on the visual content contained within digital images, information that cannot be obtained from any other online source. With Optical Character Recognition (OCR) technology, it recognizes text in graphics and images and can even analyze colored type or transparent text on any background. You can also check the People option for face recognition and select no banners.

Netvue

Netvue is another cool image search tool. The images are organized as a slideshow, you can regulate the slide show speed and even turn it off. Browse thumbnail images to a central window, with links to original full size image source. Test


Flickr

Flickr Images - Its the top image sharing community on the web sharing their best photos with you. Many unique photos can be found, many personally photographed and with copyrights reserved. You can browse in detailed or thumbnail view. Another option is to sort by View: Most relevant or Most recent or Most interesting (test) as judged by the community. Many Flickr users have chosen to offer their work under a Creative Commons license, which means you can use their content with some rights reserved. Test.


Webshots

Webshots is another huge photo sharing community where people upload their choicest photos and share them. Lookout for copyright issues in these photo album collections. They have a desktop software to have fun with your wallpapers and screensavers. Test.


Photobucket

Photobucket is a huge resource of great images. It is a free online image hosting service that gives webmasters a free alternative to host large images, saving their server bandwidth. Most images might not have a copyright notice, so beware before reusing. Test.


Getty Images

Getty Images Search - They are famous for those unique stock photos you find on magazines, newspapers and corporate new blogs worldwide. Browse through their huge collection and find unique images not indexed by other search engines. In the multiple options, select only Editorial Images (All Editorial, All time). You can also sort by Horizontal or Vertical. Register to get price quote. Test.


Corbis

Corbis is another popular huge database that provides stock Images. You can search through Rights Managed, Royalty-Free images. You can search by Photography and Illustrations too. But you need to register with Corbis - to license the best images available, view and download large images with no watermarks, use personalized lightboxes to store and share your favorite images and license and download images online. Free stock photos can also be found at Clipart.com, FreeFoto, Stock.xchng


warning Warning on Usage - Image search engines help you find the best photos and images online, but that does not make them yours to crop, edit and photoshop. Many of these images you find are copyrighted and for personal use. Some photos are shared with limited creative commons licenses and some rights reserved. Enjoy them but lookout for the copyright notices and if you are allowed to reuse them.

Read More......

Run Custom Code On Selective Blogger Posts

Often we want to display ads on selective posts. By default, once the ad code has been added to blogger template, it appears on every single blog post. Suppose, we do not want to show ads on About, Contact and Archive pages. Or we want that posts having more than 10 comments should get image banner ads instead of text ads. Suppose you have a multi author blog, and you want that every author runs its own ad code on the post written by them. Or you may want that posts with tag 'Software' display no ad or only display only image ad. How to do all this? Well, here is the solution.

------------------------------------------------------------------------------------------------------------------------------


Display Author's Own Ad Code On His Post

Suppose, there is a multi-author blogger blog owned by Alex, Peter and Melinda. They all have Adsense accounts and want to display their own ad code on the posts written by them. How to achieve this? Let's see...
The following code will run each author's own ad code on the post written by them. In this example, the ad will appear at the end of post body. If you want to display the ad just below the post title shift the if...else section above the <data:post.body/> line.


<data:post.body/>
<b:if cond='data:post.author == &quot;Alex&quot;'>
/* Put Alex's Adsense Code or Custom HTML/JavaScript here */
<b:else/>
<b:if cond='data:post.author == &quot;Peter&quot;'>
/* Put Peter's Adsense Code or Custom HTML/JavaScript here */
<b:else/>
/* Put Melinda's Adsense Code or Custom HTML/JavaScript here */
</b:if>
</b:if>


------------------------------------------------------------------------------------------------------------------------------

Run Custom Code On Selective Posts


Let's take one more example. Suppose, we decide not to show any ad on About, Contact and Archive pages. Or we may decide to run some custom code instead of Adsense ad on these pages. To achieve this, our template code must identify the correct page while reader is opening it in the browser. How to achieve this? Let's see...
Every post in blogger has a unique post ID associated with it. This post ID is generated when the post is published. Drafts do not have any post ID associated with them. First open your post in blogger editor, in our example, it's Contact page. Now see the URL in your browser's address bar. You will find the post ID at the end of the URL, as shown in the image below.

blogger-post-id

Copy this code in notepad and close the post. Now add the following code in your template.


Note: Replace xxxxxxxxxxxxxxxxxxx with your post ID


<data:post.body/>
<b:if cond='data:post.id == &quot;xxxxxxxxxxxxxxxxxxx&quot;'>
/* Put Custom HTML/Javascript Code here */
<b:else/>
/* Put Regular Adsense Code here or leave it blank to show no ad */
</b:if>

------------------------------------------------------------------------------------------------------------------------------


Run Custom Code on the Basis of Comments


Here is one more possibility. Let's say, a blogger may want to run custom code on posts having no comments or having more than 5 comments. On the other hand, he may want that posts having comments between 1 to 5 display regular Adsense ads. How to achieve this? Let's see...


Possibilities and combination's can be infinite. I just took an example to explain the trick.


<data:post.body/>
<b:if cond='data:post.numComments == 0'>
/* Put Custom HTML/Javascript Code here */
<b:else/>
<b:if cond='data:post.numComments &gt; 5'>
/* Put Custom HTML/Javascript Code here */
<b:else/>
/* Put Regular Adsense Code here or leave it blank to show no ad */
</b:if>
</b:if>


------------------------------------------------------------------------------------------------------------------------------


Run Add On Custom Code Based On Post Tags (Categories)

Here is one more example. Suppose, you want to run custom code on all those posts having 'Software' tag (Category) associated with them, in addtion to your regular Adsense code. How to achieve this? Let's see...


Note: Replace Software with your Tag (Category)


<data:post.body/>
<b:if cond='data:post.labels'>
<b:loop values='data:post.labels' var='label'>
<b:if cond='data:label.name == &quot;Software&quot;'>
/* Put Custom HTML/Javascript Code here */
<b:else/>
</b:if>
<b:if cond='data:label.isLast != &quot;true&quot;'/>
</b:loop>
</b:if>
/* Put Regular Adsense Code here or leave it blank to show no ad */


NOTE: You can shift these codes to appropriate place in the template according to your needs.

Read More......

10 Things Bloggers must Check Before Publishing a Post

Many a times, after hitting the ‘publish’ button, I realized what I missed out or what additional things could have been done to attract more visitors. Later on, I realized the need of a checklist that I should make use of before hitting the ‘publish’ button. I discovered that the checklist really helped me out, as such I wanted to write about it, to help budding bloggers and other Co-authors of this blog.


  • Catchy Headline:
    To attract maximum people to read an article, an article must have a good, simple and a catchy headline.

  • Opening Contents:
    You must avoid writing off-the-topic and bogus things on the opening lines of your post, specially in the first paragraph. If you do so, many readers will go away from your blog ultimately affecting your blog and its credibility.

  • Spell Check:
    This is another important aspect, every blogger must practice. If yuo mkae scuh splleing erorrs, agian it mya aeffect yuor bolg. You can imagine how annoying spelling errors are, from the preceding line. So, you must never forget to run spell check before you feel, your post is ready to be published.

  • Grammatical Errors:
    Again, by this point your readers will judge you and your writing skills which ultimately would affect your earnings and revenue. So, after you complete writing the whole article, read it back atleast once to find any grammatical errors.

  • Bullets & Text Formatting:
    Readers usually tend to read the whole articles in brief, as such highlighting important things and making use of bullets should really help.

  • Images:
    There’s a famous saying “A picture is worth a thousand words” and I too feel the same. If you make use of a related image, it will further add stars to your article. Also, do never forget to rename the image relating to the contents of your blog as it is good for SEO.

  • Alignments:
    To make your post look decent and give an appealing look, I strongly feel, you should never publish your post leaving the whole text unaligned. For aligning the article you should prefer ‘Justify’ option. Also, if any images are used you must align them with proper margins and wrapping.

  • Back-Links:
    On the bottom of every post, you must add links of various things your wrote about in the whole article. For example if I am writing an article about ‘Opening a new Gmail account’ then on the bottom of post I should link to related pages like Gmail | Registration | About

  • Sources, Credentials and Related Articles
    Never forget to add links and give credits to those blogs or websites where you basically saw the articles you are writing about. By this your readers may not blame you, upto some extent, if the information you blogged about is false. Also adding up related articles on the bottom of every post is another tactic many pro blogger follow. This way, you can keep your readers stuck to your blog ultimately resulting in increase of your revenue and profits.

  • Categories and Tags:
    Not to mention, this is the most important thing you must look. This will help your blog reader to browser your blog posts category wise and would also be helpful for locating similar articles.

Read More......

Limitation of Blogger ( Blogspot) Blogs

There are usage limits imposed by every free service, including Blogger.com. Often, the limits are necessary for design purposes (e.g., how much space to cater for each form field), logistics (e.g., server space and speed) and financial considerations. Most of the answers on the amount of storage space, limitations on posts, etc. are found in Blogger Help. However, since we still receive queries on that, we thought we shall add a few more items to that list for the benefit of the new Bloggers. These limits apply to one Google account, and if you find yourself exceeding these limits, one solution would be to register for an additional Google account to enjoy the services.

1. Number of Blogs

There is no limit on the number of Blogger Blogs you can create with your Google account. If you are creating Google sites using Google Page Creator, you are allowed to have a maximum of 5 different sites.

2. Blog Address

This is the name inserted between http:// and .blogspot.com. The limit is 37 characters.

3. Blog Title

The Title can go up to 90 characters.

4. Blog Description

The Blog Description can have a maximum of 500 characters.

5. Profile

When you are at “Edit User Profile” page, you can add information about yourself under “About Me” and this has a maximum of 1,200 characters. For other fields like “Interests”, “Favorite Movies” and so on, each has a limit of 2,000 characters.

6. Number of Team Members

You can have as many team members, contributors or administrators as you would like. Add the authors under Settings -> Permissions.

7. Number of Posts

There is no limit to the number of Posts you can have in each Blog. All the posts (whether published or saved as drafts) will be in the Blogger account unless they are deleted. With or without the Archives Page Element in your Blog, the posts are still stored.

8. Size of Posts

There is no limit to the size of each post but as we shall see, there is a limit to the page size. Because of that, if you are posting the entire contents of your book, try to split it into chapters and have each chapter under a new post. Otherwise, you may find your very long post not displayed once it hits the page size limit.

9. Size of Pages

Each page has a size limit of 1MB. This is a rather large size and if your posts are short, you can display a few hundred posts on the main page. At the moment, under Settings -> Formatting, you can show up to 999 posts on a page. Should you encounter a 006 error message, you can set a smaller number of posts so that the page size limit will not be exceeded. As mentioned earlier, if your one post already exceeds the 1MB limit, there is little you can do except to split that article into separate posts.

10. Size of Pictures

As we had mentioned in Manage Blogger Image Storage Space, pictures and graphics that are uploaded onto our free Blogger Blogs are now stored in Picasa Web Albums and it assigns each Google account a storage capacity of 1GB. Since this stores the pictures of all our blogs under the one Google account, we would have to pay Google should we need more storage space. The alternative would be to create new blogs under different Google accounts. (Note that in Google Pages, the total size of pages and uploaded files cannot exceed 100MB.)

11. Size of Videos

Recently, Blogger introduced a new feature which allows you to upload videos in your posts. The upload is done through Google Video and there is no limit to the number of videos you can upload, nor is there a limit on the size or length of each video.

As Google also owns YouTube, you may like to know that there is a 100MB file size limit and a maximum 10-minute length limit for YouTube videos. Should Google Video merge with YouTube one day, their rules on usage may be aligned.

12. Amount of Bandwidth

While some service providers place a daily or monthly cap on the amount of data that can be transferred from their sites, Blogger does not appear to impose such bandwidth limits. There is no problem to you having a million visitors a day to your Blog. What you should be mindful of is the limit imposed by external providers. For example, if the Blog's background images are uploaded onto free image hosts, once the bandwidth limit imposed by these hosts is exceeded, the background images will not be loaded and visitors will see many empty spaces in your layout.

13. Number of Comments

There is no limit to the number of comments to the posts. They are saved in your account even if you choose to “Hide Comments” under the Settings -> Comments tab.

14. Number of AdSense Ads

Since you can insert Google AdSense Ads through the Blogger “Add a Page Element” function, for the sake of completeness, we should also state the current limits stipulated in AdSense rules. Each Blog page can display a maximum of:-

  • three AdSense for Content Ad units;
  • two AdSense for search boxes;
  • three Link units;
  • three Product Referral units

This means that even if you have configured AdSense Ads to appear after every post, on a page where there are ten posts, AdSense for Content Ads will automatically be shown in only three of them.

Read More......

No AdSense Ads Below Blog Title or Post Title

no-adsense-below-title

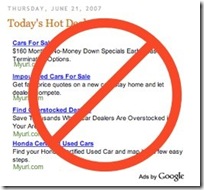
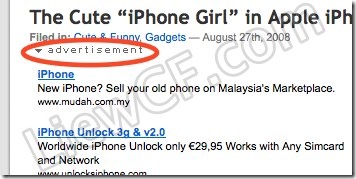
By referring to Google AdSense placement heat map, we put Google AdSense ads above blog content (below post title) for better performance. But Google AdSense team does not quite agree with the ads placement.


QuickOnlineTips received an email from Google AdSense support pointing out the issue on their site.

In fact, Google Adsense Blog published 2 guidelines earlier and one of them is “ads shouldn’t be placed under a title or section heading in a way that implies that the ads are not ads.


I didn’t take much attention to the guideline because I thought mine is different than the example. My AdSense ads was separated by categories and date. But it seems AdSense team think the different.


AdSense team advised QuickOnlineTips that:


“publishers may not label the Google ads with text other than ’sponsored links’ or ‘advertisements’.”

As a result, QuickOnlineTips now put a “ADVERTISEMENT” word above the AdSense ads.


Ads


I also made the change to add “advertisement” image above my AdSense ads, although I haven’t received any email from Google AdSense about matter.

I know many AdSense publishers used put AdSense ads below post title (it’s really a heat spot!), so make the required changes before too late!

Read More......

Rank Higher with Customized Permalinks

How to Rank Higher in Google - Creating Customized Permalinks in Blogger


What are Permalinks?

Permalinks tell a lot about the page it points to. One can read out the article name in the status bar of the browser when hovering over the permalink (by the way, permalinks are the permanent links to every post page which usually contains the title of the post). Search engines use permalinks to categorize the posts. Browsers use permalinks to navigate to remote pages.

How are they created …

Permalinks are generated automatically by your Blogging platform based on the Title of the post.


… in Blogger?

Unfortunately, Blogger users are left with no option, but to accept the permalink automatically awarded to them. There is no option to customize permalinks. Blogger just takes the first few characters of the title (somewhere between 35 and 40) and makes a permalink which might be incomplete at times. For a post with the title, “The Advantages and Disadvantages of using a customized permalink every time”, the permalink will be something like http://onlinemoneyxtreme.blogspot.com/2008/10/the-advantages-and-disadvantages-of/


What should I do?

Luckily we have come up with an idea to customize the permalink. The method is called “Publish and Republish method”. This is illustrated using the above example (”The advantages and disadvantages of using a customized permalink every time”)

  • Since Blogger permits only 35 to 40 characters in its permalink, find a short title for the post. For instance, ‘Analysis of Customized Permalinks’ can be a short title for the same post.
  • Publish the post with this short title. Now the permalink will read http://themelib.com/2008/10/analysis-of-customized-permalinks/
  • Blogger does not change its permalink even if we change the title of the post in future. We exploit this limitation of Blogger here. Edit the post (Manage posts -> Edit) and change the title to ‘The Advantages and Disadvantages of using a customized permalink every time’. Now the permalink will remain same, but the post title will read the new way.

Conclusion

This trick is useful when you decide to use stylish titles. It can also be used to remove the unnecessary details from the permalink and project the necessary ones. A concise permalink is one tip for SEO (Search engine optimization).

Read More......

Add Yahoo Buzz button to your blog Post

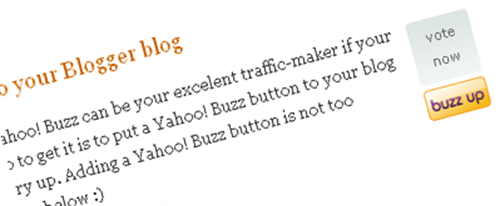
As I said in the previous post, Yahoo Buzz can be your excellent traffic-maker if your story is interesting and get to Yahoo! homepage. The First Step to get it is to put a Yahoo! Buzz button to your blog so that people can vote your entry up. Adding a Yahoo! Buzz button is not too complicated if you follow my steps below


Step 1. Choose your favorite button from Yahoo! Buzz that fitted well with your site design (large button with vote count -Square Button - is highly recommended), then click “Get Code”.

Step 2. If you have selected the Square Button the code will be like this

<script type="text/javascript" src="http://d.yimg.com/ds/badge2.js" badgetype="square">ARTICLEURL</script>


Step 3. Replace the ARTICLEURL with <data:post.url/>. After replaced, your code will look like this


<script type="text/javascript" src="http://d.yimg.com/ds/badge2.js" badgetype="square"><data:post.url/></script>


Step 4. Now go to your Blogger account


Step 5. Go to Layout -> Edit HTML


layout-html


Step 6. The best place to display Yahoo! Buzz button is under the Post Title and on the right. Because of the variation of blogger templates on the web, I recommend you put Yahoo! Buzz code above the tag <data:post.body/>. We will add style to the button to make it float to the right. Yeah, more beautiful


Your template code will look something like this


<div style='float:right;padding:5px;'><script badgetype='square' src='http://d.yimg.com/ds/badge2.js' type='text/javascript'><data:post.url/></script></div>
<data:post.body/>


Of course, if you want it float to the left, it is fine. Change the code float:right; to float:left;

Step 7. Save your template, see your work and start buzzing up your posts. Hey, do not try to spam their page or you will be banned


buzz-in-action-1

If you have any issues in adding the Buzz button to your blog, feel free to leave a comment here


P/s: I’ve created a demo page for you in 2 minutes. You can see it in action now. Feel free to test it.

Read More......

Yahoo! Buzz is open for everybody

It’s been about six months since Yahoo Buzz launched and now Yahoo has decided to “open-up” Buzz. The Yahoo Buzz is similar to Digg, in which users can vote popular Internet news stories up and down.


buzz-what-is-the-buzz


When a story got so much buzz, it will be reached the Yahoo! homepage! This is good news for publishers because those who have already experienced a “Yahoo! Buzz Effect” have talked about the surge in traffic they experienced once Yahoo placed an article on their homepage.


* Salon got so excited when they had 1 million unique visitors a day, the most ever to the 12 year old site.


* US Magazine was linked from Yahoo on February 27, and had the second highest traffic day ever. 32% of visits that day came from the Yahoo home page.


* Huffington Post reported 800,000 unique visitors from a Yahoo-linked story


* Smoking Gun, Portfolio.com, Dallas Morning News and Imaginova all reported significant traffic increases after links from the Yahoo home page.


* Sugar, Inc. sites have had nearly 1.8 million unique visitors sent from five different Buzz stories on the Yahoo home page


Content that people can Buzz up! include stories, photos, and video. You just have to look for sites that include the Buzz Up button or submit the stories here once it goes live in a few hours.

Read More......

AJAX Labels Reloaded

The AJAX Labels is back with more features! I was planning to release this with my new template, but the template design is slipping beyond schedule.
Note: If you want to integrate AJAX Labels with Phydeaux3's Label Clouds, read this post and come back here.
Some of the new features are:

  • Built-in navigation system.
  • More user customizability. (You don't even need to know coding for that!)
  • Support for Unicode Categories in IE.
  • More user-friendly installation. (Code to be copied/modified in template is reduced)


The installation of this hack afresh would be easy. But upgrading from my previous version is a bit knotty. Anyway, I will explain both. If you get stuck, feel free to comment and I'll be there to help. FRESH INSTALLATION Click here for Up gradation instructions. If you already have AJAX Labels installed, you can directly jump to up gradation instructions. Like the first version, this one too needs the Prototype JS framework. You can either store it in a location of your preference, or use the location that I've given below. First of all, back up your template. It is always a good idea to back up your template, so that you can revert if you mess things up. 1. Click Page Layout->Edit HTML. Check the box saying "Expand Widget Templates" Look for the </head> tag in your template. Insert the following code just above that.


<style type='text/css'>
#indicator {position:fixed;z-index:1000;padding:15px 0;top:40%;background-color:#FFFFFF;border:1px solid #AAAAAA;width:176px;left:50%;margin-left:-88px;text-align:center;}
#search-result {border:1px solid #AAAAAA;padding:10px;padding-bottom:30px;font-size:85%;}
.search-result-meta {background:#EFEFEF;padding:2px;}
.search-result-meta img {border-width:0;vertical-align:text-bottom;}
.search-title {font-size:1em;padding-bottom:3px;font-weight:bold;text-align:left;text-decoration:underline;}
.search-cat {display:block;padding:3px;font-size:1em;margin-top:5px;margin-bottom:5px;border-bottom:1px solid #C0C0C0;font-weight:bold;}
.search-close {color:silver;float:right;border:1px solid #F5F5F5;margin-top:10px;cursor:pointer;}
.search-result-nav {font-size:1.4em;font-weight:bold;padding:5px 0pt;text-align:center;}
</style>
<script type='text/javascript' src='http://bloggerhacked.googlepages.com/prototype.js' />
<script type='text/javascript'>
//<![CDATA[
// User customisable parameters
// ----------------------------
// maxresults - Number of results to show per page
// navFlag - Set Navigation ON or OFF. Give 1 for ON and 0 for OFF.
// feedLabel - Text to show for the label feed link.
// catLabel - Label for categories.
// closeLabel - Label for Close button. You can use hypertext also.
var maxresults = 5;
var navFlag = 1; //ON by default
var feedLabel = "Subscribe to";
var catLabel = "Sorted into:";
var closeLabel = "Click to close";
//]]>
</script>
<script type='text/javascript' src='http://bloggerhacked.googlepages.com/ajaxlabels.js' />

Note: You can avoid the prototype script addition line if you already have added the prototype.js script to your template (It is quite likely, if you have added some hack to your blog). If you don't understand what I'm saying, never mind. Now the customization part. See the snippets in red above. Those are the stuff which you can customise. Just above that I have written comments on what each represent. To customize them, you just need to modify them to the appropriate value. For example, if you want to change the close button text from "Click to close" to, say, "[X]", then simply change "Click to close" in the red area to "[X]". Navigation Feature: The navigation feature allows pagination of the results. So you can view all the results in several pages. maxresults and navFlag together determine how it is shown. navFlag is the parameter saying whether you want this feature or not. The number of results shown per page will be decided by maxresults. The number of pages will be calculated automatically. Eg: Lets say, you have 13 posts with a particular label in your blog. Case 1: maxresults=5 and navFlag=1 You will have 3 pages (peekaboo blocks) with 5 results each. There will be a navbar which will let you go to any of those 3 pages. Case 2: maxresults=5 and navFlag=0 You will have a single page with 5 recently updated posts with the particular label. You won't be able to view other results Case 3: maxresults=20 and navFlag=1 You will have a single page with 13 results (Because 13 is less than 20). If you know CSS, you can modify the look of your result block as well. 2. Locate the following code in your template:

<b:loop values='data:post.labels' var='label'>
<a expr:href='data:label.url' rel='tag'><data:label.name/></a>

  Replace it with this:

<b:loop values='data:post.labels' var='label'>

<a href='#sres' expr:onclick='"javascript:getCat(\"" + data:label.name + "\",null)"' rel='tag'><data:label.name/></a>


3. Optional:If you have the labels widget in your template.

Locate the following code in your template:


<b:if cond='data:blog.url == data:label.url'>
<data:label.name/>
<b:else/>
<a href='data:label.url'><data:label.name/></a>
</b:if>


Replace it with this:

<b:if cond='data:blog.url == data:label.url'>
<data:label.name/>
<b:else/>
<a href='#sres' expr:onclick='"javascript:getCat


(\"" + data:label.name + "\",null)"' ><data:label.name/></a>
</b:if>


4. Click on the button below.


<div id="indicator" style="display:none"><img alt="Indicator" src="http://bloggerhacked.googlepages.com/indicator.gif" /> Loading...</div><div id="search-result" style="display:none"><a name="sres"></a><div class="search-close" onclick="javascript:Element.hide('search-result')"><span id="preserve28e29bc50e8543bdbc285c3b47ad246c" class="wlWriterPreserve"><script type="text/javascript">document.write(closeLabel);</script></span></div><div id="show-result"></div><div class="search-close" onclick="javascript:Element.hide('search-result')"><span id="preservee463285a218e49dfabc9efcfc5e8ae87" class="wlWriterPreserve"><script type="text/javascript">document.write(closeLabel);</script></span></div></div>This will take you to an Add Widget Screen. Select your blog and click on Add widget. 5. Save your template. That was a breeze, wasn't it? UPGRADATION Caution! If you are installing AJAX Labels for the first time, don't proceed any further. You are already finished with your installation. This section is only for upgrading from the previous version. 1. Back up your template first. (Be pessimistic in these matters ;) ) 2. Go to Edit HTML. Look for my previous installation of Javascript. It is very easy to find. It is enclosed within <!-- Begin Categories --> and <!-- End Categories --> Delete that entire portion. 3. Now check Step 1 of the FRESH INSTALLATION section. Follow that step and come back here. 4. Search for the following snippet in your template. '"javascript:getCat(\"" + data:label.name + "\")"' There will be two places where this occurs. Replace both places with this '"javascript:getCat(\"" + data:label.name + "\",null)"' 5. Save your template and go to page layout screen and delete the HTML/Javascript widget you had created when you installed the previous version. 6. Go to step 4 of FRESH INSTALLATION section. Follow that step and come back here. 7. Save your template and you are done. There! That was not very difficult. ACKNOWLEDGEMENTS Tsung-Kai Chen - For his several comments and the bugs he found in the previous version. Bahram - For the heads up on the Unicode Category issue in IE. Update 1: The code had minor syntax errors (due to wrong copy paste)because of which the hack was not working. Problem is fixed now. Reinstalling the hack will make it work. Update 2: Drat! Another silly mistake. The Close button was not working. I've fixed this. Just delete the widget and add it again (Step 4) . You don't have to redo any other steps. Update 3: Arrgh!! Another bug. I have made the corrections. You will have to redo Steps 2, 3 and 4. This will remove support for the rel-tag microformat. I will release an update if I find a way to work around that.

Read More......

Javascript Redirect Traffic from Blogspot to WordPress Site

Ok. So you’ve had a blogspot blog for a little while and you’ve decided you want a WordPress site. How do you redirect traffic from the old site to the new site and lose as little traffic as possible in the process.

First.  Use the import feature available in WordPress.  From your Daskboard, look for Tools > Import

Second.  Add some javascript code to your blogger template. Update the vars blogTitle and wordPressUrl to match your blogspot blog.


<script>
var blogTitle = 'Flexing My Kerkness';
var wordPressUrl = 'http://kerkness.ca';

if( document.title == blogTitle ){
window.location = wordPressUrl;
} else {
var newUrl = str_replace( document.title, blogTitle+’: ‘, ” );
window.location = wordPressUrl + ‘/?s=’ + newUrl;
}
function str_replace(haystack, needle, replacement) {
var temp = haystack.split(needle);
return temp.join(replacement);
}
</script>

Basically what this script does is redirects from your blogger site to your new domain while conducting a search based on the title of page being requested.

For example. If you had a post called “How to change outboard motor oil” on blogger. When you try and access the blogspot url for that post you will be directed to the new wordpress domain and you will search for posts matching “How to change outboard motor oil”. If that post was imported into word press and you haven’t changed the title. Users will be shown a link to the post on your new site. Also they may find any new or relevant content you’ve posted since making the change to WordPress.

Read More......

Show Limited Number of Labels in Widget.

As you write more and more posts you will keep adding labels to them to categorize your posts. You can add more than one label to any single post. Labels are useful as they serve as keywords channelling traffic to your posts through search engines like Technorati.

However the list of labels in your blog can get to be very long stretching your sidebar until y

our blog post looks like a flag on top of a long sidebar. To prevent this you can modify the code of your Labels widget to show only the topmost labels in your blog..............


LIMIT LABEL NUMBER


To limit the number of labels shown in your Labels sidebar widget login at Blogger.com and click 'Layout' link on Dashboard. The Page Elements subtab of Template tab will open. If you do not have a Labels widget in the sidebar Add a Labels Page Element to it.

After the Labels widget is added click on Edit Html subtab of Template tab. This will open the Template code box on the Edit Html subtab. Click the Expand Widgets Template checkbox on top of the Template code box to put a check mark in it. The Template code box will show the expanded widgets templates.

Scroll down in the Template code box to locate the code for the Labels widget. This will look like this :

<b:widget id='Label1' locked='false' title='Labels' type='Label'>
<b:includable id='main'>

<b:if cond='data:title'>
<h2><data:title/></h2>
</b:if>
<div class='widget-content'>
<ul>
<b:loop values='data:labels' var='label'>
<li>
<b:if cond='data:blog.url == data:label.url'>
<span expr:dir='data:blog.languageDirection'>
<data:label.name/>
</span>
<b:else/>
<a expr:dir='data:blog.languageDirection' expr:href='data:label.url'>
<data:label.name/>
</a>
</b:if>
<span dir='ltr'>(<data:label.count/>)</span>
</li>
</b:loop>
</ul>

<b:include name='quickedit'/>
</div>
</b:includable>
</b:widget>


REPLACE THE WHOLE ABOVE CODE WITH THE CODE BELOW :


<b:widget id='Label1' locked='false' title='Labels' type='Label'>
<b:includable id='main'>
<b:if cond='data:title'>
<h2><data:title/></h2>
</b:if>
<ul>
<script type='text/javascript'>
var labelnum = 0;
<b:loop values='data:labels' var='label'>
if (<data:label.count/> &gt; 2) {
document.write(&quot;<li><a expr:href='data:label.url + "?max-results=100"'
rel='nofollow'><span><data:label.name/></span></a>(<data:label.count/>)</li>&quot;);
}
</b:loop>
</script>
</ul>
<b:include name='quickedit'/>
</b:includable>
</b:widget>


The code above will only show labels with more than two posts. To increase number of labels increase the number two in this code :


if (<data:label.count/> &gt; 2) {


Read More......

Multi-Pinging Tools Compared.

Everytime you make a post to your blog or update it you have to ping the search engines


to notify them of the changes you have made. I have dealt with this in an earlier post : Pinging Simplified. There are some sites which can ping multiple engines for you in one click. Here I have compared several such tools......


There are several sites where you can submit your blog url and click the Ping button to notify the search engines and directories of new content. These are :


1. Autopinger.com
2. Pingoat.com
3. Pingomatic.com
4. Blogflux Pinger.
5. Feedburner Pingshot.
6. Feedping.com


Except for Feedburner just go to the respective site and paste your blog url and click on the Ping button after publishing a new post. For feedburner login to your account click on your blogname (You should have claimed your blog first as shown in Feedburner and Blog feeds.) and click on Publicize tab at top. Then click on Pingshot in the sidebar. Choose the services you wish to ping and click Save. Now these services are automatically pinged on publishing a new post.

Read More......

Add Widget to provide Button-Link to your Blog.

You can now add a widget to your blog with a button which when clicked adds a button link to your blog from the reader's blog. This is done automatically without the reader having to type in even a line of code.....

First create a button by going to http://cooltext.com/Buttons and create a button for your blog. Then upload this button picture to a freehost like Googlepages and copy down the url of the picture. Let us call it : URL OF YOUR BUTTON PICTURE.


To do this go to Layout from the Dashboard after logging in to your account. In the Page Elements section click on Add Page Element link in the sidebar. In the new pop up window which opens choose Html/Javascript option. In the content section paste the following code :

<form action="http://beta.blogger.com/add-widget" method="POST">

<input value="FAVOURITE" name="widget.title" type="hidden"/>

<textarea style="display:none;" name="widget.content">


bUTTONcODE

</textarea>
<input
value="http://buzz.blogger.com" name="infoUrl" type="hidden"/>

<input
value="http://www.blogger.com/img/icon_logo32.gif" name="logoUrl" type="hidden"/>

<input value="LINK TO THIS SITE" name="go" type="submit"/>
</form>
<p>Click above button to get a button link to this blog</p>


In the middle code replace the Capital letters with the appropriate values. Add all the above code in blue including the code in the middle picture. Click on picture to enlarge it. Then save the widget.

View blog. You will see below button in your sidebar:

LintositeButton


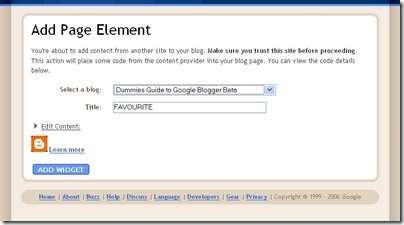
When a reader clicks on this button he is taken to a page where he has to select his blog where he wants to add the link to your blog as shown below :

AddPage Element


Here the reader can change the Title and edit the content if he/she wants. On clicking Add Page Element the link is added to the Page Elements tab in the sidebar of his blog. He/She can then rearrange its location in the blog by drag and drop method.

Using this method I have added it to my blog in the right sidebar at the bottom.

Read More......
Add to: Mr. Wong Add to: Webnews Add to: Icio Add to: Oneview Add to: Yigg Add to: Linkarena Add to: Digg Add to: Del.icoi.us Add to: Reddit Add to: Simpy Add to: StumbleUpon Add to: Slashdot Add to: Netscape Add to: Furl Add to: Yahoo Add to: Blogmarks Add to: Diigo Add to: Technorati Add to: Newsvine Add to: Blinkbits Add to: Ma.Gnolia Add to: Smarking Add to: Netvouz Add to: Folkd Add to: Spurl Add to: Google Add to: Blinklist Information